
AAC mould preparation works best as a repeatable sequence: remove residue, inspect the mould and its contact surfaces, apply the approved release agent, and verify readiness before pouring. The purpose is to give each cake a consistent starting condition. Extra coating cannot compensate for an unresolved sealing, alignment, or surface defect.
This article presents a practical preparation checklist for production teams and equipment buyers. Cleaning methods, chemical selection, maintenance limits, and acceptance criteria must match the installed system and the plant’s validated process.
Why Treat Mould Preparation as a Separate Quality Step?
Give the preparation station its own release decision because a fault becomes more expensive to investigate once the mould contains slurry. A short, recorded inspection creates a clear boundary between a mould that is ready and one that needs attention. Without that boundary, problems can circulate through several shifts before anyone connects them to the same component.
Assign each mould a readable identity and record the side plate identity where practical. Link recurring surface damage, leakage reports, and maintenance actions to those references. Design the mould record around information available at the preparation station: its identity, the observed defect, and the action taken, with an entry method that fits the operator’s working sequence.
The AAC mould and side plate form a working assembly whose condition matters at more than one station. A component accepted during preparation still needs correct handling later in the line. Preparation records therefore belong with production history rather than in a disconnected maintenance notebook.
What Should Be Removed Before Inspection?
Remove residues that prevent a clear view or interfere with the assembly’s intended contact surfaces, using the approved cleaning method. Inspecting over an old deposit makes it difficult to distinguish a temporary buildup from actual damage. Coating over it also prevents the next operator from seeing the underlying condition.
Organize the cleaning route by surface: large faces, corners, seams, seating areas, and designated sealing locations. Use the tools specified for those surfaces so that cleaning does not itself introduce damage. Protect components that the equipment manual identifies as sensitive to water, impact, or cleaning chemicals.
- Make the mould safe for access under the site’s procedure.
- Remove loose material without pushing it into guides or seating locations.
- Clean persistent deposits using the approved tools and method.
- Collect the removed material through the site’s waste or recovery arrangement.
- Check the cleaned surface before applying fresh release agent.
A clean appearance is not a complete inspection result. The team must still decide whether seals, locks, surfaces, and seating conditions satisfy its acceptance criteria. Keep cleaning completion and mechanical acceptance as separate checklist items.
Which Inspection Points Deserve a Clear Pass or Hold Decision?
Define observable conditions that allow an operator to release the mould or hold it for maintenance. Avoid vague instructions such as “check everything” or “repair if bad.” A photograph of an accepted condition beside a documented defect example can make the decision more consistent.
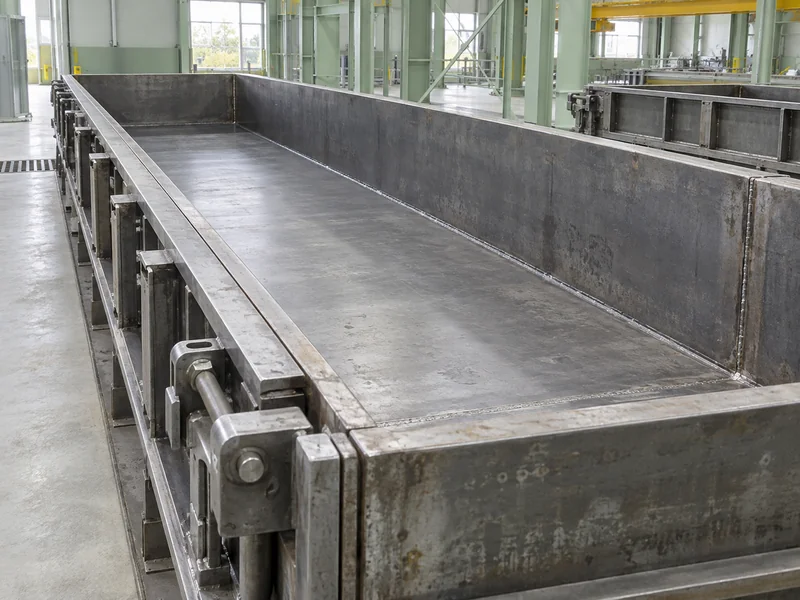
| Inspection Area | Question to Answer | Action When Uncertain |
| Internal surfaces | Can the intended surface be seen clearly without unresolved residue or damage? | Clean again or request inspection |
| Seals and joints | Are components present, seated, and acceptable under the maintenance criteria? | Hold for the responsible technician |
| Locks and locating points | Does the assembly reach its documented position correctly? | Investigate without forcing the mechanism |
| Side plate seating | Are contact locations clean and correctly engaged? | Correct and verify before release |
| Identification | Can this mould be linked to its preparation and repair history? | Restore the approved identification |
Use the maintenance specification for measurements of flatness, wear, or deformation. A general article cannot set a repair limit for every mould design. Escalate uncertain findings instead of allowing production pressure to become the acceptance rule.
How Should a Recurring Defect Be Tracked?
Record its exact location relative to the mould, not only relative to the finished block. Include the time, batch, photograph, and action taken. Compare the next production result with the same reference location.
A hypothetical example is a repeated damaged patch that follows one mould but appears across different batches. That pattern supports a focused inspection of that mould and its handling history. It does not prove that coating quantity is the cause.
How Should the Release Agent Be Selected and Applied?
Use a release agent approved for the actual AAC process, mould material, application equipment, and production conditions. Obtain the supplier’s preparation and application instructions before a trial. Do not substitute a hydraulic lubricant merely because it is available beside the machine.
Separate the product identity from its application settings in the work instruction. Record any required preparation, usable condition, coverage checks, and handling precautions from the supplier’s documentation. If the plant changes the chemical, review the procedure before treating it as an equivalent replacement.
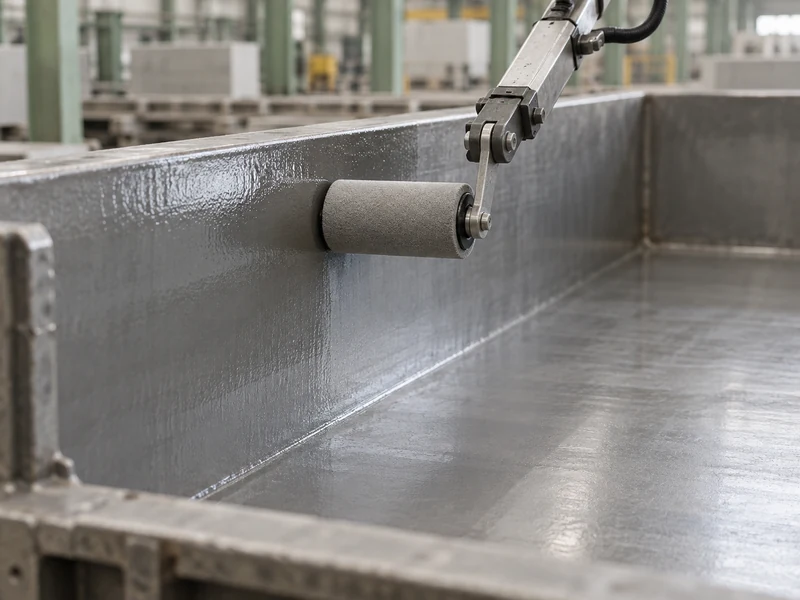
Runding’s automatic mould oiling system is described as applying release oil to internal mould surfaces. For a purchase or retrofit, confirm the actual application mechanism, compatible materials, accessible inspection points, and cleaning requirements. Evaluate the supplied configuration through a witnessed trial.
How Can Coverage Be Verified Without Overapplying?
Define what an acceptable application looks like using the approved product and method. Inspect difficult locations such as corners and areas around fixtures as well as broad faces. Record gaps, pooling, or another abnormal appearance against the supplier’s acceptance guidance.
Measure consumption over a known number of comparable mould cycles when the system permits it. A change in consumption is a reason to inspect delivery and operation, not an automatic instruction to increase or decrease flow. Compare it with coverage and demoulding results before drawing a conclusion.
Keep oil application records distinct from lubrication records. They serve different equipment functions even when both are described informally as oiling. Clear labels at the station reduce avoidable confusion during replenishment and shift changes.
What Should an Automatic Preparation Station Be Able to Demonstrate?
Ask the supplier to demonstrate repeatable positioning, the intended surface coverage, and a clear response to an interrupted cycle. Review normal production and restart behavior together. A fast demonstration cycle is insufficient if an operator cannot recognize an incomplete application.
- Identification of the mould configuration being processed.
- Visible confirmation that the application cycle completed.
- An agreed procedure for blocked delivery or abnormal coverage.
- Safe access for planned cleaning and maintenance.
- A restart sequence that avoids releasing an unverified mould.
For investment context, the article on upgrading an existing AAC plant can help frame the wider decision. Include the available space, interfaces, service access, and maintenance workload in a preparation-station assessment. These details often determine whether the proposed change fits the existing line.
How Should Preparation Connect to Pouring and Demoulding?
Use a defined handover so that pouring receives a mould with a known preparation status. Record any delay or intervention after release that could invalidate that status. The next station should not have to infer readiness from the fact that a mould has arrived.
After demoulding, send relevant observations back to the preparation team with the mould reference. Distinguish what was actually seen from the suspected explanation. For example, “material remained at the left corner” is a more useful starting record than “bad oil.”
The AAC block manufacturing process overview shows why local observations need to be connected across the line. Review upstream preparation and downstream handling together when the same symptom has several possible origins. Keep each corrective trial specific enough to evaluate.
What Should Happen During Maintenance or a Production Hold?
Mark the mould’s status clearly and prevent a held component from rejoining the normal queue without release. Record the defect, responsible person, repair action, and verification result. A verbal instruction at shift change is easy to lose.
Cleaning or inspection that exposes personnel to machine movement requires appropriate isolation. OSHA’s hazardous energy control guidance describes the need to address unexpected start-up and stored energy during maintenance. Apply the site’s equipment-specific procedure and applicable local requirements.
After a repair, verify the relevant function before returning the mould to routine use. If a trial batch is required, label it and follow its result through the agreed inspection stage. Closing the maintenance ticket should reflect that verification rather than only completion of the physical repair.
Which Records Make the Routine Worth Keeping?
Keep records that answer a production question: which moulds require repeated rework, which defects recur, and whether an intervention improved the result. Review trends by mould identity and by defect category. Avoid collecting fields that nobody uses while missing the reference needed to connect a defect to its source.
The guide to AAC plant production bottlenecks provides wider context for reviewing repeated preparation delays. Review whether the preparation checklist helps operators identify a mould that needs to leave the queue and whether the recorded mould history explains repeated interruptions at that station. Its value is demonstrated by consistent readiness and traceable corrective work, not the length of the checklist.